
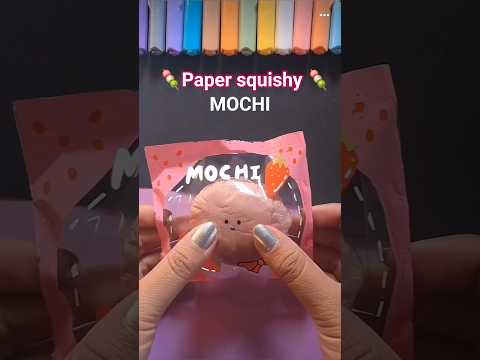
DIY Paper Mochi Squishy — Cute Mini Snack Craft 🍡🍓
Before embarking on this creative journey, it is essential to gather the correct materials. The beauty of this project lies in its simplicity, utilizing items commonly found in any home or classroom. You will need: plain white paper (standard printer paper works perfectly), a pencil for sketching, scissors for precise cutting, a roll of clear packing tape (this is the key ingredient for durability and the squishy texture), and a soft filling material. For the most effective "slow-rising" effect, the best stuffing is plastic shopping bags, cut into very small pieces. Alternatively, you can use cotton balls, foam, or fiberfill, though the compression and rebound will differ.
Step 1: Design and Cut the Base Shape The foundation of your mochi squishy is its shape. On a piece of white paper, use your pencil to draw a simple, slightly imperfect circle approximately 3-4 inches (8-10 cm) in diameter. This will form the main body of the mochi. The goal is to mimic the soft, rounded form of the Japanese rice cake. Once you are happy with the shape, place a second sheet of paper directly underneath the first and carefully cut out the circle through both layers simultaneously. This ensures you have two identical pieces that will align perfectly.
Step 2: Laminate for Durability and a Glossy Finish This step is crucial for transforming fragile paper into a resilient squishy. Take your first paper circle and cover it completely with overlapping strips of clear packing tape. Allow the tape to extend slightly beyond the edges of the paper. Once one side is covered, flip it over and do the same to the other side. Trim the excess tape around the circle's edge. Repeat this entire process for the second paper circle. This "lamination" technique not only makes the paper strong and tear-resistant but also gives it a smooth, glossy finish similar to a real mochi's sheen.
Step 3: Constructing the Mochi Shell
Now it is time to join the two laminated pieces. Place one circle on top of the other, ensuring they are perfectly aligned. Begin taping the edges together using small pieces of clear packing tape. Carefully press the tape down to create a strong, airtight seal. Work your way around the circumference of the circles, connecting them, but be sure to leave a small opening, about 1-2 inches wide. This gap is essential for the next step, as it will be the entry point for your stuffing.
Step 4: The Crucial Stuffing Process The quality of your squishy is determined by its filling. If you are using plastic bags, ensure they are cut into very small, confetti-like pieces. Begin pushing the stuffing through the opening into the paper mochi shell. Use a pencil or a thin stick to gently push the filling into all the corners, ensuring an even distribution. The key is to fill it until it is plump but not overstuffed. It should feel full but still have plenty of room to be compressed. An overstuffed squishy will be too firm and will not have the satisfying, slow-rising quality.
Step 5: Sealing and Finalizing the Squishy Once you are satisfied with the amount of stuffing, the final step is to seal the opening. Carefully pinch the open edges together, making sure no stuffing is caught in the seam. Use another small piece of clear packing tape to securely close the gap. Press firmly to ensure the seal is airtight. Your basic mochi squishy is now complete! Give it a gentle squeeze to test its texture and rebound. The trapped air and soft filling inside the laminated paper shell work together to create the signature slow-rising effect.
To elevate your creation from a simple ball to a realistic mochi, you can add decorative elements. For a strawberry mochi, for example, draw and cut out a small strawberry and a leaf shape from paper. Color them with markers or colored pencils, and then laminate them with tape just as you did with the main body. Attach these small decorative pieces to the top of your mochi using a small, rolled-up piece of tape. This final touch adds a layer of personality and visual appeal, making your handmade squishy a true work of art.
In conclusion, this DIY paper mochi squishy is more than just a simple craft; it is an exercise in creating something tactile and satisfying from the most basic materials. By following these systematic steps—designing, laminating, assembling, stuffing, and decorating—anyone can produce a high-quality, durable, and incredibly soft sensory toy. The final product is not only a testament to your creativity but also a functional stress-relief tool that you can customize in endless ways. Experiment with different shapes, sizes, and decorations to create an entire collection of handmade squishies.
0 Response to "DIY Paper Mochi Squishy — Cute Mini Snack Craft 🍡🍓"
Post a Comment